resistant starch foods list pdf

What is Resistant Starch?

Resistant starch is a type of carbohydrate that resists digestion in the small intestine. It ferments in the large intestine, feeding beneficial gut bacteria; This process produces short-chain fatty acids, offering various health benefits.

Definition of Resistant Starch

Resistant starch, a unique form of dietary fiber, is defined as the total starch and its degradation products that resist digestion in the small intestine. Unlike typical starches that break down into glucose, resistant starch passes through the small intestine undigested. This undigested starch then enters the colon, where it undergoes fermentation by the gut microbiota. This fermentation process leads to the production of beneficial short-chain fatty acids. The resistant nature of this starch means it doesn’t contribute to rapid blood sugar spikes like other carbohydrates. Instead, it acts as a prebiotic, nourishing the good bacteria in the gut and promoting a healthy microbiome balance. This makes it a valuable component of a healthy diet with potential benefits for digestion and overall well-being.

Types of Resistant Starch

Resistant starch is categorized into four main types, each with distinct characteristics. These types are based on their source, structure, and how they are processed.

Type 1 Resistant Starch

Type 1 resistant starch is found in foods like partially milled grains and seeds. This type of starch is physically inaccessible to digestive enzymes because it is trapped within the plant’s cell walls. The fibrous structure of these foods protects the starch from being broken down in the small intestine. Grinding or milling these foods can make the starch more accessible, reducing the resistant starch content. Examples include whole grains, some legumes, and dense starchy foods where the starch granules are embedded within the cellular matrix, and it requires processing like milling to release it. Type 1 resistant starch is a natural form of resistant starch, and its presence depends on the plant’s structure.

Type 2 Resistant Starch

Type 2 resistant starch is characterized by its unique granular structure that makes it difficult for digestive enzymes to access and break down. This form of resistant starch is commonly found in raw starchy foods such as unripe green bananas and raw potatoes. The starch granules in these foods are tightly packed, creating a compact structure that resists enzymatic digestion in the small intestine. The compact nature of Type 2 resistant starch prevents it from being easily metabolized by the body. As a result, it passes through to the large intestine, where it is fermented by the gut microbiota, contributing to the production of beneficial compounds. Cooking these foods will generally change the starch structure and reduce resistant starch content.

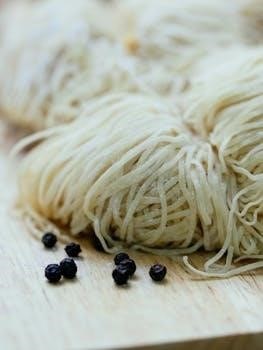
Type 3 Resistant Starch

Type 3 resistant starch, also known as retrograded starch, is formed when starchy foods are cooked and then cooled. This process alters the molecular structure of the starch, causing some of it to become resistant to digestion. Examples include cooked and cooled potatoes, rice, and pasta. The heating gelatinizes the starch, making it digestible; however, upon cooling, some of the starch molecules realign, forming a crystalline structure that digestive enzymes cannot easily break down. This process increases the resistant starch content of these foods, making them beneficial for gut health. The amount of retrogradation, and therefore the resistant starch content, can vary depending on cooking method and cooling time. This type of resistant starch is a good option to incorporate into your diet.

Type 4 Resistant Starch

Type 4 resistant starch is a chemically modified form of starch created through industrial processes. Unlike the naturally occurring types, it does not form through cooking or cooling but is specifically engineered to resist digestion. These modifications are usually performed to create resistant starch, which can be incorporated into processed foods such as breads, cakes, and other baked goods. The chemical modifications alter the structure of the starch, making it difficult for digestive enzymes to break it down. This type of resistant starch aims to add the health benefits of resistant starch to processed foods without the need for cooking or cooling. While it is not naturally found in whole foods, it is increasingly used in the food industry to enhance the nutritional profile of various products.

Health Benefits of Resistant Starch

Resistant starch offers numerous health advantages, including improved gut health, enhanced insulin sensitivity, and support for weight management. These benefits stem from its unique ability to ferment in the colon.

Gut Health Improvements

Resistant starch plays a vital role in promoting a healthy gut. Unlike regular starches that are digested and absorbed in the small intestine, resistant starch travels to the colon where it is fermented by the gut microbiota. This fermentation process produces short-chain fatty acids (SCFAs), such as butyrate, which are crucial for maintaining the integrity of the gut lining and reducing inflammation. Butyrate, in particular, has been shown to have anti-inflammatory effects and can help protect against conditions like colon cancer. By nourishing beneficial bacteria, resistant starch contributes to a balanced gut microbiome, which is essential for overall health. Additionally, it can help ease constipation by promoting regular bowel movements and increasing stool bulk. The fermentation of resistant starch also leads to a healthier gut environment, reducing the risk of various digestive issues.

Improved Insulin Sensitivity

Resistant starch has a notable impact on improving insulin sensitivity, which is the body’s ability to effectively use insulin to regulate blood sugar levels; When we consume resistant starch, it bypasses digestion in the small intestine, reducing the rapid release of glucose into the bloodstream. This, in turn, decreases the demand for insulin, potentially leading to better blood sugar control over time. Studies suggest that regular consumption of resistant starch can enhance the body’s response to insulin, which can be particularly beneficial for individuals with insulin resistance or at risk of developing type 2 diabetes. By improving insulin sensitivity, resistant starch may also help reduce the risk of conditions like heart disease and Alzheimer’s disease, which are often linked to impaired insulin function. Furthermore, a diet rich in resistant starch may help stabilize blood sugar levels, promoting better metabolic health.

Weight Management

Resistant starch plays a significant role in weight management due to several factors. Firstly, it has fewer calories per gram compared to regular starches, containing only 2.5 calories versus 4 calories. Secondly, resistant starch is not easily digested, meaning the body expends more energy trying to break it down. This increased energy expenditure can contribute to weight loss or maintenance. Additionally, resistant starch promotes feelings of fullness and satiety, helping to control appetite and reduce overall food intake. By slowing down digestion, it also helps prevent rapid spikes in blood sugar, which can often lead to cravings and overeating. Furthermore, the fermentation of resistant starch in the large intestine produces short-chain fatty acids, which can influence metabolism and fat storage. Therefore, incorporating resistant starch into your diet can be a valuable strategy for achieving and maintaining a healthy weight.

Foods High in Resistant Starch

Foods rich in resistant starch include oats, rice, green bananas, beans, legumes, and cooked then cooled potatoes. These foods offer various types of resistant starch, contributing to health benefits.

Naturally Occurring Sources

Many whole foods naturally contain resistant starch, offering a variety of options to incorporate into your diet. Unripe bananas, particularly green ones, are a notable source of type 2 resistant starch, which is difficult for digestive enzymes to break down. Legumes like beans and lentils are also rich in resistant starch, providing both fiber and nutritional value. Whole grains such as oats, barley, and some varieties of corn contain type 1 and type 3 resistant starches, depending on processing. These starches are found within the cell walls or formed during cooling. Additionally, raw potatoes contain type 2 resistant starch. These naturally occurring sources offer a good base for increasing resistant starch intake through whole food options. It is important to note that processing methods affect the resistant starch levels of these foods.

Modified Starch Sources

Modified starch sources are created through specific processing techniques to enhance the amount of resistant starch. Type 4 resistant starches are often chemically modified and found in certain processed foods, including some types of bread and cakes. High amylose varieties of corn, wheat, barley, potato, and rice have been specifically bred to increase their resistant starch content. These modified starches are designed to survive baking and extrusion processes, making them suitable for use in processed food products. Some flours, such as green banana flour, plantain flour, cassava flour, and potato starch, contain high levels of resistant starch when raw but lose this property when cooked. These modified starch sources offer an alternative for incorporating resistant starch into processed food products and recipes, but the resistant starch content can vary depending on the processing methods used.

Preparation Methods for Resistant Starch

Cooking and cooling starches, like potatoes, rice, and pasta, increases their resistant starch content. This process, known as retrogradation, transforms some digestible starch into resistant starch.

Cooking and Cooling Starches

The process of cooking and then cooling certain starchy foods is a key method to enhance their resistant starch content. When foods like potatoes, rice, and pasta are cooked, their starch granules absorb water and swell. Upon cooling, a portion of this starch undergoes a process called retrogradation. During retrogradation, the starch molecules reorganize themselves, forming a structure that is more resistant to digestion in the small intestine. This transformation increases the amount of resistant starch present in the food. It’s important to note that the degree of retrogradation and the resulting increase in resistant starch can vary depending on the specific food, the cooking method, and the cooling time.

1980’s gas yamaha sun classic golf cart owner manuals pdf

The Yamaha Sun Classic golf cart, a notable model from the 1980s, exemplifies enduring vintage design and performance. Its popularity continues, making original owner manuals vital for preservation and operation.

The Enduring Appeal of Vintage Golf Carts

Vintage golf carts, like the 1980s Yamaha Sun Classic, hold a special charm for many enthusiasts. These classic carts offer a unique blend of nostalgia and functionality. Their simple designs and robust construction make them appealing to those who appreciate the craftsmanship of older vehicles. Owners often enjoy the process of maintaining and restoring these timeless machines, ensuring their continued use for years to come. The community surrounding vintage carts adds to their overall allure;

Importance of Owner Manuals for Maintenance

Owner manuals are crucial for maintaining vintage golf carts, like the Yamaha Sun Classic. They provide essential information for proper care, ensuring reliable performance and longevity.

Following Maintenance Schedules in the Manual

Adhering to the maintenance schedules detailed in your Yamaha Sun Classic owner’s manual is essential for optimal performance. These schedules outline specific tasks and intervals, ensuring your vintage gas-powered golf cart remains reliable. Regular checks and timely maintenance, as directed by the manual, can help prevent potential issues and extend the lifespan of your cart. This proactive approach ensures years of enjoyment.

Ensuring Reliable Performance of Vintage Models

Maintaining the reliability of a vintage golf cart like the 1980s Yamaha Sun Classic requires diligent care, as outlined in the owner’s manual. Proper adherence to the recommended maintenance procedures is vital for preventing breakdowns and ensuring consistent performance. The manual provides detailed instructions that enable owners to keep these classic carts running smoothly. This dedication helps preserve their legacy and functionality.

Locating 1980s Yamaha Sun Classic Owner Manuals

Finding original owner’s manuals for the 1980s Yamaha Sun Classic golf carts can be challenging. However, digital PDF versions are often available, offering a convenient alternative for owners.

Challenges in Finding Original Manuals

The age of the 1980s Yamaha Sun Classic golf carts presents a significant hurdle in locating original paper manuals. These documents, due to their age, are often lost, damaged, or simply unavailable. Many owners struggle to find intact, authentic versions, making the search a considerable challenge for those seeking original documentation for their vintage carts.

Availability of Digital PDF Versions

Fortunately, digital PDF versions of the Yamaha Sun Classic golf cart owner manuals are increasingly accessible online. These digital formats offer a convenient alternative to scarce original paper copies. Owners can often find these PDFs on various online forums, enthusiast websites, or through dedicated golf cart manual repositories, making the information more readily available for download and use.

Content of Yamaha Golf Cart Owner Manuals

Yamaha golf cart owner manuals typically include crucial information such as operation instructions, maintenance guidelines, and troubleshooting tips. These manuals serve as essential resources for owners.

Operation Instructions

The operation instructions section in a Yamaha golf cart owner’s manual provides detailed steps for starting, driving, and stopping the vehicle. It includes information on using the accelerator, brake pedals, and other controls. This section is crucial for new owners to familiarize themselves with the correct and safe operation of the golf cart, ensuring proper handling and avoiding potential accidents.

Maintenance and Care Guidelines

The maintenance and care guidelines section of the owner’s manual outlines essential procedures for preserving the golf cart’s condition. This includes instructions on regular checks, lubrication, cleaning, and specific maintenance tasks. Following these guidelines helps ensure the longevity and reliable operation of the vintage Yamaha Sun Classic. Proper maintenance is crucial for avoiding costly repairs and keeping the cart in optimal condition.

Troubleshooting Common Issues

This section provides solutions for typical problems encountered with the vintage Yamaha Sun Classic golf cart. The manual will include diagnostic steps and repair advice for issues like engine troubles, starting difficulties, or unusual noises. Having a troubleshooting guide is essential for quick fixes and helps owners understand the common problems, enabling them to maintain their cart effectively. This section will be very useful for owners.

Specific Manuals for Yamaha G5 Sun Classic

For the Yamaha G5 Sun Classic model, locating both the factory repair manual and the original owner’s manual is crucial for proper maintenance and care of the vehicle.

Finding the G5 Factory Repair Manual

Securing a factory repair manual for the Yamaha G5 Sun Classic can be challenging, as these are often not widely available. Enthusiasts and owners may need to explore online forums, vintage golf cart communities, and specialized parts suppliers to locate a copy, either in physical or digital PDF format. Such a manual is essential for detailed repairs.

Original Owner’s Manual for G5

Locating the original owner’s manual for the Yamaha G5 Sun Classic is crucial for proper operation and maintenance. This manual contains specific instructions, safety precautions, and vehicle details. It is a primary source for understanding the cart’s features and ensuring safe use. Owners should seek out online versions, potentially found on forums or dedicated manual sites, as physical copies may be scarce.

Copyright and Usage of Online Manuals

Yamaha retains copyrights for online owner’s manuals. Copying, modifying, or distributing these manuals is prohibited. It’s important to use official Yamaha sources to ensure accuracy and avoid legal issues.

Restrictions on Copying and Modifying Manuals

Online Yamaha owner’s manuals are protected by copyright and intellectual property rights. Users are strictly prohibited from copying, modifying, or distributing any part of these manuals. These restrictions are in place to protect Yamaha’s ownership and ensure the integrity of the information provided. Unauthorized usage may result in legal consequences, as Yamaha maintains control over its intellectual assets. Respecting these copyright terms is essential for accessing and using these manuals.

Importance of Official Yamaha Sources

Relying on official Yamaha sources for owner’s manuals is crucial to ensure accuracy and avoid misinformation. Manuals from unofficial sources might contain errors or be for different models. Using official Yamaha manuals safeguards your golf cart and protects your investment. Official manuals also provide the most relevant and updated information. Always use genuine Yamaha manuals to maintain the cart’s performance and lifespan.

Key Information in Owner Manuals

Owner’s manuals contain crucial data including vehicle identification, serial numbers, and essential safety precautions. These details are vital for proper maintenance and safe operation of the golf cart.

Vehicle Identification and Serial Numbers

The frame serial number, serving as the primary identification, is typically located on the rectangular pipe beneath the operator’s seat. This number is crucial for identifying the specific model and year of your Yamaha Sun Classic golf cart. Knowing the exact serial number is essential when ordering parts or seeking technical support and also useful for verifying the authenticity of the vehicle.

Safety Precautions and Warnings

When working on the battery of your Yamaha Sun Classic, it is essential to avoid any open flames, sparks, or smoking near the vehicle to prevent potential fires or explosions. Always disconnect the battery before performing any maintenance or repairs. These precautions are crucial to ensure your safety and the proper functioning of the golf cart, as well as the prevention of accidents and damage.

Specific Information in Owners Manual

Owner’s manuals for the Yamaha Sun Classic provide detailed specifications, including transmission information. They also outline periodic inspection and adjustment procedures crucial for maintaining the cart’s performance.

Transmission Specifications

The owner’s manual for the 1980s Yamaha Sun Classic golf cart provides crucial transmission specifications, detailing the type of transmission used in the vehicle. This section clarifies gear ratios, fluid types, and maintenance guidelines specific to the cart’s transmission system. Understanding these specifications is essential for proper care and to ensure the smooth operation and longevity of your vintage golf cart.

Periodic Inspection and Adjustment

The owner’s manual emphasizes the importance of periodic inspection and adjustment for your Yamaha Sun Classic golf cart. This section outlines the specific components that require regular checks, such as brakes, tires, and steering mechanisms. Following the manual’s guidelines on these inspections and necessary adjustments helps maintain optimal performance, ensuring the safety and reliability of your vintage cart during operation.

Additional Resources for Yamaha Golf Cart Owners

Owners can find help through the official Yamaha Golf Car Manuals site. Online forums and communities also offer valuable support, information, and shared experiences.

Yamaha Golf Car Manuals Site

The official Yamaha Golf Car Owners Manual site is a crucial resource, offering genuine manuals to help protect your investment. These manuals are specifically for United States models, and they are available exclusively in English, ensuring accuracy and reliability. Avoid unofficial sources and rely on Yamaha’s official materials for proper guidance. This is your go-to place for the most reliable manuals.

Online Forums and Communities

Online forums and communities serve as valuable platforms for Yamaha golf cart owners to connect, share experiences, and offer assistance. These spaces often host discussions on locating manuals, troubleshooting issues, and general maintenance tips. They provide a collaborative environment where owners can benefit from collective knowledge and advice, enhancing their understanding of their vintage Yamaha golf carts. This is a great place to get specific questions answered.

Troubleshooting and Safety

Safety is paramount when maintaining a vintage golf cart. Always avoid sparks and open flames near the battery. Refer to your owner’s manual for essential safety guidance.

Safety Precautions when working with the battery

When handling the battery of your 1980s Yamaha Sun Classic golf cart, utmost caution is necessary. Never smoke or allow any sparks or open flames near the vehicle to prevent potential fires or explosions. It is imperative to disconnect the battery before commencing any work. Always refer to the safety guidelines in your owner’s manual for comprehensive instructions.

Operating and maintaining the cart

To ensure the longevity and optimal performance of your vintage Yamaha Sun Classic, it is critical to operate and maintain the golf cart as directed by the owner’s manual. This includes following specified maintenance schedules, using appropriate fluids, and adhering to the operational guidelines. Regular inspection and prompt addressing of any issues contribute to a safe and enjoyable experience.

ffxi red mage guide

Red Mage Overview in FFXI

Red Mage, often called RDM, is a versatile job in FFXI, known as a “Jack of All Trades․” They combine White and Black magic with sword and dagger combat, offering unique support capabilities․ Red Mages excel in enfeebling and enhancing, wielding powerful magic․

Red Mage Core Abilities

Red Mages possess a unique blend of abilities, making them highly adaptable․ They have access to both White and Black magic, allowing them to heal, support, and deal damage․ Their core abilities include a high proficiency in Enfeebling magic, making them excellent at debuffing enemies with spells like Blind and Silence․ Red Mage also have potent enhancing magic, bolstering allies with spells like Blink and the spikes․ A crucial ability is “Convert,” which allows them to exchange HP for MP, crucial for sustaining their magic․ Furthermore, they possess the spell Refresh, providing MP regeneration for themselves or other mages․ Red Mages also gain access to strong single target enhancing magic, and they are one of the few jobs that can remove enemy buffs․ These core abilities form the foundation of the Red Mage’s diverse and supportive playstyle, allowing them to adapt to various roles within a party․

Versatility of the Red Mage

The Red Mage’s versatility is a hallmark of their design in FFXI․ They are not masters of any single role, but their broad range of skills allows them to contribute to almost any party composition․ They can function as a support, a secondary healer, a debuffer, and even a melee combatant․ This adaptability makes them a valuable asset in a variety of situations․ Red Mages are able to use swords and daggers, and even though they aren’t the strongest melee fighters, they can still do damage․ Their ability to use both White and Black magic gives them a wide range of spell choices and the ability to fill different roles on the fly․ Their versatility allows them to fill in the gaps in a party, making them a welcome addition to any group․ Their broad skill set, however, also means they have specific strengths, like being the best at enfeebling․

Red Mage Roles in FFXI

Red Mages in FFXI have diverse roles, adapting through the game’s lifespan․ They are known for their versatility․ From early support to later hybrid roles, they are valuable assets in any party, shifting as needed․

Early Game Red Mage Roles

In the early stages of Final Fantasy XI, Red Mages fill crucial support roles within parties․ Their primary tasks revolve around enfeebling enemies using spells like Dia and Blind, weakening their combat effectiveness․ They also provide crowd control by casting sleep spells on linked monsters, preventing additional threats․ Additionally, Red Mages act as secondary healers, offering backup support for White Mages with their healing spells; They also contribute to the party’s damage output, using black magic nukes when the situation allows․ Furthermore, their melee capabilities, while limited, can be utilized at lower levels․ Red Mages are very important in the early game because of their versatility, adapting to various combat situations․ This range of abilities makes them a valuable asset to any early game party, providing a foundation for their adaptable nature later on․ Their ability to fulfill a variety of roles ensures they are never useless, making them a great choice for new players․

Evolving Roles in Later Expansions

As Final Fantasy XI progresses through expansions, the role of the Red Mage undergoes a significant transformation․ Their early game functions of enfeebling, crowd control, and backup healing start to blend into a more defined support and strategic role․ With the release of the Treasures of Aht Urhgan expansion, Red Mages became more focused on enhancing and support rather than damage dealing․ They become known for their enhancing skills and have access to single-target spells like Blink and Blaze Spikes which provide significant improvements over other magic users․ They also gain more specialized enfeebling magic and continue to be the go-to job for landing spells like Blind and Silence․ Additionally, their ability to remove enemy buffs becomes increasingly valuable․ Red Mages adapt their play style, becoming adept at multiple roles, such as debuffer, healer, enhancer, and even a tank, all while retaining their versatility which means that they can be useful in any end-game content․

Red Mage Strengths and Specialization

Red Mages in FFXI are masters of Enfeebling and Enhancing magic․ They possess the highest skill in these areas, making them crucial for debuffing enemies and buffing allies․ Their unique skills set them apart․

Enfeebling and Enhancing Magic

Red Mages in Final Fantasy XI are renowned for their exceptional proficiency in both enfeebling and enhancing magic․ They possess the highest skill caps in these magical disciplines compared to other jobs․ This specialization allows them to consistently land crucial debuffs on enemies, such as Blind and Silence, making them invaluable in various combat scenarios․ Their enfeebling magic not only weakens foes but also provides a tactical advantage to the party․ Moreover, Red Mages are adept at enhancing their allies with spells that boost their attributes, improving their overall combat effectiveness․ They can cast spells like Blink and the various spike spells with effectiveness․ This dual focus on debuffing and buffing makes the Red Mage a key support job, able to control the flow of battle and improve the performance of their team․ Red Mages’ ability to weave these spells effectively sets them apart․

Hybrid Nature of the Red Mage

The Red Mage in FFXI embodies a true hybrid nature, seamlessly blending magical prowess with physical combat skills․ This unique combination allows them to fill multiple roles within a party, adapting to various situations․ While not a master of any single area, their proficiency in both melee combat with swords and daggers, and a wide array of magic spells allows for flexibility․ They can switch between dealing damage, applying debuffs, and providing support, making them a valuable asset in any group․ Their ability to weave spells and perform melee attacks allows them to contribute in multiple ways․ While their physical damage output might not match dedicated melee jobs, their hybrid nature allows them to weave melee attacks between spell casts, making them a versatile choice․ The Red Mage exemplifies adaptability․

Red Mage Playstyle

Red Mage gameplay involves adapting to different situations․ They use enfeebling magic initially, followed by damage and support; Solo play focuses on damage, while parties require varied roles like debuffing, healing, and enhancing, depending on the situation․

General Combat Strategy

A Red Mage’s combat approach in FFXI is a dynamic blend of magic and melee, adapting to the needs of the battle․ Initially, they often begin by applying enfeebling spells like Dia and Blind to weaken enemies․ As the fight progresses, they transition to a more flexible role, utilizing both offensive and support magic․ The Red Mage’s unique ability to switch between roles makes them a valuable asset in any group․ They can contribute to damage dealing, provide backup healing, and enhance party members with buffs․ Understanding when to use each skill is key․ Managing MP is important, using Refresh and Convert to maintain resources․ A skilled Red Mage will also utilize their melee skills as needed, weaving physical attacks between spell casts․ Their hybrid nature means they must constantly assess the battlefield and adjust their strategy accordingly, making them a challenging yet rewarding job to play effectively․ They must be prepared to fill multiple roles⁚ debuffer, healer, enhancer, and nuker/burster․

Solo Play Focus

When playing solo, Red Mages in FFXI must lean heavily on their damage-dealing capabilities while also ensuring their own survivability․ Unlike group play where their support role is crucial, solo Red Mages focus on maximizing their offensive magic and melee skills․ They often prioritize using spells that inflict damage over time, allowing them to kite and manage enemy aggro․ Enhancing spells like Stoneskin and Blink become vital for mitigating damage, while self-healing spells keep them in the fight․ A Red Mage’s ability to use Convert allows them to restore MP, ensuring that they can continue casting spells․ The gear choices for soloing will often focus on increasing magic attack and accuracy․ They also can use melee skills effectively, weaving attacks between spells․ This requires a shift from a support-oriented mindset to a more self-reliant one, making them a versatile and effective solo class․ The key is to balance offensive and defensive capabilities, using their full kit․

removing comments from pdf

Methods for Removing Comments from PDFs

Several methods exist for removing comments from PDFs, including online tools, software like Adobe Acrobat and SwifDoo PDF, and using eraser tools. You can also utilize JavaScript, right-click menus, or Preview on macOS, as well as batch removing options for efficiency.

Online Tools for Comment Removal

Numerous online platforms offer free services to remove annotations from PDF documents. These tools typically operate by allowing users to upload a PDF file, after which the user can initiate the comment removal process. The platform then processes the file, removing all annotations, and provides a downloadable version of the cleaned PDF. These online tools often handle various types of annotations, including text boxes, highlights, and stamps. Moreover, they can remove hyperlinks and fillable form fields, offering a comprehensive solution for cleaning PDF files. The convenience of these tools lies in their accessibility; users don’t need to install any software. After removing the comments, some online platforms delete output files within 24 hours to ensure data privacy. These tools also provide options for sending the files via email. The user friendly design of these online resources ensures efficient annotation removal without needing technical expertise, making the process simple and accessible for everyone.

Using Adobe Acrobat for Annotation Removal

Adobe Acrobat provides robust tools for annotation removal, particularly with its DC version. Users can leverage the Action Wizard to efficiently remove annotations from multiple PDFs within a folder, streamlining the process. This tool allows users to create customized actions for specific needs. Accessing the Action Wizard is straightforward via the Tools menu. With Adobe Acrobat, one can manage and adjust actions as required, enhancing flexibility. Additionally, users can manually delete annotations within the document using the delete key or the context menu. In Acrobat Pro, there is an option to remove all comments at once, which simplifies cleaning a heavily annotated PDF. Adobe Acrobat is versatile, enabling the removal of various types of annotations, thereby providing comprehensive control over PDF content. By using Adobe Acrobat, users have a reliable, professional solution for annotation management, ensuring a clean and streamlined PDF document.

SwifDoo PDF for Deleting Annotations

SwifDoo PDF offers a user-friendly approach to deleting annotations from PDF documents. To begin, download and launch the SwifDoo PDF application, then open the desired PDF file. Navigate to the “Annotate” tab and select “Manage.” In the management options, users will find a “Delete all annotations” button, providing a quick way to remove all comments at once. Alternatively, there is a “Hide annotation” button to temporarily conceal annotations without permanent deletion. This software recognizes that annotations include not only text, but also multimedia and graphic elements like underlines and highlights. SwifDoo PDF simplifies the process of cleaning up annotated documents, making it easy to remove unwanted comments. It offers a clear distinction between hiding and deleting annotations, which is important when managing PDF files. SwifDoo PDF streamlines annotation management within its simple interface.

Removing Annotations with the Eraser Tool

The eraser tool provides a direct and intuitive method for removing annotations from PDF documents. This tool specifically targets and eliminates annotations, such as highlights, comments, and drawings, without affecting the original document content. By simply clicking on an annotation with the eraser tool, the selected annotation is removed. It’s important to note that the eraser tool is designed to only remove elements added as annotations; it will not alter or remove any original text or images within the PDF itself. If users wish to make portions of the original document invisible, a broad white pen can be used to overlay and conceal those parts. This distinction is essential to remember when using the eraser tool, as it differentiates between annotations and the base document. This method offers flexibility for cleaning up annotated files. The eraser tool is a precise way to remove specific comments.

Removing Annotations from Moodle PDFs

Removing annotations from PDFs within the Moodle environment requires a specific approach due to its integrated annotation tools. When encountering errant stamps or annotations, users should first select the annotation tool, typically represented by an arrow icon in the toolbar. After choosing the selection tool, click on the specific annotation you wish to remove. A box will appear around the selected annotation, indicating it is active. Within this box, a trash can icon should be visible, usually in the upper right-hand corner. By clicking this trash can icon, the selected annotation will be removed from the PDF. It is important to note that unlike some other programs there may not be a traditional undo function. This method is applicable to various types of annotations, including stamps, comments, and other modifications made within the Moodle PDF viewer. This approach ensures annotations are removed and that the desired state of the document is achieved. This is a very important tool in Moodle.

Removing Annotations using the Right-Click Menu

The right-click menu offers a straightforward method for removing annotations from a PDF document. To utilize this approach, begin by locating the specific annotation you want to delete within the PDF. Then, place your mouse cursor directly over the annotation icon itself. A right-click will bring up a context-sensitive menu. Within this menu, you should find an option labeled “Remove Annotation.” Selecting this option will immediately remove the selected annotation from the document. To ensure these changes are saved, you will need to save the document. Typically, this is done by clicking the menu button, frequently located in the top-right corner of the application, followed by choosing the “Save As” option. This action allows you to save the modified document as a new file, preserving the original document if needed. This approach is suitable for removing individual annotations one by one or in bulk if you repeat it for each annotation. Using the right-click menu is a very efficient and convenient method that is accessible for removing comments from PDF documents.

JavaScript for Programmatic Annotation Removal

JavaScript offers a powerful way to remove PDF annotations programmatically, providing developers with the ability to automate the process. This method is particularly useful when dealing with a large number of documents or when you need to integrate annotation removal into a larger workflow or application. By utilizing JavaScript, you can control how annotations are deleted, such as removing all annotations at once, or filtering to remove only certain types of annotations. Programmatic removal is also a highly efficient method that requires minimal user interaction, and the process can be customized based on specific needs. Many web-based PDF viewers and SDKs, like the Apryse Web SDK, provide robust JavaScript APIs that allow for programmatic manipulation of PDF documents, including annotation removal. You can often find sample code and documentation for how to do this online. This allows for seamless integration into web applications or serverless document processing solutions. By using JavaScript, you can create custom solutions for managing annotations in PDFs.

Removing Annotations in Preview on macOS

Preview, the built-in PDF viewer on macOS, provides users with several options for removing annotations from PDF documents, though it may not be as straightforward as other dedicated PDF editors. To remove annotations, users can utilize the Inspector pane. Within the Inspector, there is an Annotations tab that lists all annotations present in the document. Users can select annotations from this list and delete them using the delete key. Another way to remove annotations is to select the annotation directly on the PDF and then use the delete key. It’s also possible to use the selection tool to select multiple annotations and delete them all at once. However, Preview does not offer a one-click option to remove all annotations at once. So, users may need to manually select each annotation they wish to remove. If you want to remove them all, you need to select them all first using Command + A. There is also no option to save the document without annotations. So, users must save a copy without annotations if they wish to keep the original.

Batch Removing Annotations

Batch removal of annotations from PDF documents is a valuable technique for users who need to quickly clean up multiple files or remove numerous annotations within a single document. This process typically involves selecting multiple annotations at once and then applying a delete action. Various PDF software programs and online tools offer methods for batch annotation removal. For instance, in some applications, users can press and hold the Shift key (or Command on macOS) while clicking on the first and last comment in a series to select all annotations in between. After selecting multiple annotations, a right-click menu often provides a “Delete” option for batch removal. Another approach involves using a selection tool to drag a box around multiple annotations, selecting them simultaneously, and then deleting. Batch removal options are particularly useful when dealing with large documents or a large number of PDFs that need to be cleaned up. Some programs also allow batch processing of many files at the same time, significantly speeding up the annotation removal process. This feature is important for professionals who work with large volumes of documents on a daily basis.

Hiding Annotations vs Removing them

When working with PDF annotations, it’s crucial to understand the difference between hiding and removing them, as each action serves a different purpose. Hiding annotations temporarily conceals them from view, allowing you to focus on the original content without distractions. This is often achieved through a “hide annotations” button or a similar feature in PDF viewers, which essentially toggles the visibility of comments and other markups. However, hidden annotations are not deleted; they remain embedded in the document and can be made visible again with the toggle function. Conversely, removing annotations permanently deletes them from the PDF file. This action cannot be undone, so it’s important to use this function with caution. Once removed, annotations are no longer part of the document, and there is no way to restore them unless you have a backup copy of the original file. The choice between hiding and removing annotations depends on your specific needs. If you need to temporarily clear the clutter while retaining the annotations, hiding is the best option. But if you want to permanently clean up a document, then removing the annotations is the way to go.

the wild at heart trophy guide

Welcome, trophy hunters! This guide will navigate you through the challenges of obtaining every achievement in The Wild at Heart. Prepare for a journey across Azuma, where you’ll hunt Kemono, master Karakuri, and complete quests. Discover all the secrets and unlock the coveted Platinum trophy by following this guide.

Embark on an exciting journey to collect all the trophies in The Wild at Heart, a game that blends action RPG elements with a unique Karakuri crafting system. This guide will serve as your comprehensive resource, detailing each trophy and providing tips for success. The trophy list is diverse, encompassing story progression, Kemono hunting mastery, Karakuri expertise, side quest completion, and exploration. Whether you’re a seasoned trophy hunter or new to the challenge, this guide will help you navigate the intricacies of the game’s achievements. The game features a total of 30 trophies on some platforms, while others may have 49, including a highly sought-after Platinum trophy. This guide will cover both scenarios, ensuring you have the information needed to unlock every single one. Get ready to explore Azuma, defeat formidable Kemono, and master the art of Karakuri to achieve 100% completion in The Wild at Heart. Prepare for a rewarding experience as you work your way through this challenging and engaging trophy list, utilizing strategies to minimize resource consumption and maximize your efficiency.

Platinum Trophy⁚ All The Trophies, Probably

The pinnacle of achievement in The Wild at Heart is undoubtedly the Platinum trophy, aptly named “All The Trophies, Probably.” This prestigious award is bestowed upon players who have demonstrated mastery over all aspects of the game by collecting every other trophy available. Securing this platinum signals a complete understanding of the game’s mechanics, from hunting ferocious Kemono to constructing intricate Karakuri and fulfilling various side quests. It’s a testament to dedication and skill, requiring players to fully explore the world of Azuma and overcome every challenge it throws your way. This trophy is the ultimate goal for many players, and this guide will assist you in achieving it. To obtain this, you will need to diligently work through each aspect of the game, completing each objective and unlocking each trophy. This journey will require patience, strategy, and a thorough understanding of every gameplay element. The Platinum is not just a trophy; it represents the ultimate accomplishment in The Wild at Heart. Obtaining this trophy is a mark of a true master of the game.

Number and Types of Trophies

The Wild at Heart features a diverse array of trophies, totaling 30 in number, spread across different tiers, ensuring a balanced and engaging challenge for all players. These trophies are categorized into four distinct types⁚ Bronze, Silver, Gold, and the coveted Platinum. The majority of the trophies, 17 in total, are Silver, forming the backbone of your trophy hunting journey. There are 8 Bronze trophies, which are generally easier to obtain, often relating to early game achievements. The pursuit of the 4 Gold trophies will require more dedication and skill, involving significant milestones in the game. Finally, the single Platinum trophy represents the ultimate goal, achieved only after acquiring all other trophies. This structure encourages players to explore the full scope of the game. The distribution of trophy types ensures a rewarding experience, with each tier offering varying levels of difficulty and accomplishment. This structured system provides a clear path for trophy hunters to follow, guiding them towards the ultimate achievement.

Story-Related Trophies

Progressing through the narrative of The Wild at Heart will naturally unlock a set of story-related trophies, marking key milestones in your journey. These trophies are generally unmissable, and they serve as indicators of your advancement through the game’s plot, so they can be obtained just by playing the game normally. One such trophy is awarded for successfully reaching Azuma, where you will be able to explore the vast regions and hunt new types of Kemono. Another key trophy is earned by defeating the Earthbreaker along Harugasumi Way, a significant story-driven encounter. You will also earn a trophy when you save Minato by defeating Amaterasu, and another for defeating the final story boss located in the sacred mountain. These story-based trophies guide you through the main storyline and provide a sense of accomplishment as you proceed through each chapter. These trophies cannot be missed if you complete the main story, so you do not need to worry about them. Keep playing the main story, and these trophies will unlock automatically.

Trophies Related to Kemono Hunting

A significant portion of The Wild at Heart’s trophies are tied to your prowess in hunting Kemono, the large, powerful beasts that roam the lands. You’ll earn trophies for defeating specific types of Kemono, often requiring mastery of different combat techniques and strategies. Some trophies will be awarded for hunting deeply volatile Kemono in all the different areas of the game, pushing you to explore the entire map. There are also trophies that will require you to hunt a certain amount of each type of Kemono, including Shelterhorns, Gumblops, Bloat Toads, and Brimcaps, and also Faeflies. Other trophies will require you to defeat a Kemono before it can land a single attack on you, which demands a good level of skill and strategy. Additionally, there may be trophies linked to using different weapon types against Kemono, such as the staff, bladed tonfa, spear, and giant shuriken. You’ll be able to track your progress by opening the menu and viewing the radar chart in the communication section, which shows how many Kemono you have slain with each weapon. These trophies encourage you to be a versatile hunter.

Trophies Related to Karakuri

The unique Karakuri system in The Wild at Heart is not just a gameplay mechanic but also a path to several trophies. These ancient machines are central to combat and exploration, and mastering them is key to unlocking certain achievements. Some trophies will be awarded for conjuring a large number of basic Karakuri, pushing you to frequently utilize these structures during hunts. Other trophies will focus on specific applications of Karakuri, perhaps requiring you to use them in creative ways during battles or for traversal through the environment. There might also be trophies linked to experimenting with different Karakuri combinations and setups to take down Kemono in a more efficient way. Furthermore, one trophy requires you to break crystals with Barblings, utilizing Karakuri without actually throwing them, which means you’ll need to get creative with how you use your environment. The trophies related to Karakuri encourage experimentation and thoughtful integration of these machines into your hunting strategies, rewarding you for mastering this unique aspect of the game.

Trophies Related to Side Quests

Venture beyond the main storyline to uncover the many side quests that The Wild at Heart has to offer, as these quests are directly tied to certain trophy unlocks. A significant portion of these trophies revolve around completing side quests offered by various characters, often involving hunting specific Kemono or gathering resources. There are side quests given by Toothpicks that require you to hunt a series of monsters in a certain order. Completing these side quests is not only beneficial for character progression but also crucial for securing all the trophies. Another trophy involves completing a specific number of side quests alongside another player, thus encouraging you to engage in the multiplayer aspect of the game. These side quest trophies encourage thorough exploration of the game world and interaction with its characters and their stories. These side quests will test your skills and require you to defeat different Kemono, some of which can be quite challenging, but the rewards, including trophies, make it worthwhile.

Trophies Related to Collectibles and Exploration

Delving into the world of The Wild at Heart unveils numerous collectibles and hidden areas that contribute to your trophy collection. Several trophies are tied to fully exploring the game’s expansive maps. This means venturing into every nook and cranny, revealing all areas of the Deep Woods, and uncovering hidden locations throughout Azuma. The game rewards thorough exploration with trophies, encouraging players to leave no stone unturned. A big part of this stage of trophy hunting involves finding all collectibles hidden throughout the game’s world. This includes items and other things that can be found in the environment. Another trophy requires you to befriend a large number of Tsukumo, which involves finding and interacting with them throughout your exploration. Therefore, exploration is not only about uncovering the map but also about finding all the different collectibles hidden around the world. These trophies encourage a deep engagement with the game world and its hidden treasures.

Tips and Strategies for Trophy Hunting

Embarking on the trophy hunting journey in The Wild at Heart requires a strategic approach. Firstly, consider save scumming to minimize resource consumption, particularly Heartwood Resin and Scrap, which are crucial for crafting and upgrades. Prioritize completing the story-related trophies first to unlock all areas and game mechanics. Focus on mastering the various weapon types, as some trophies are tied to specific weapon usage. Keep an eye out for opportunities to complete multiple objectives at once. For example, while hunting Kemono, try to fulfill related side quest objectives. It’s also a good idea to track your progress on the various trophies to help you stay focused. Some specific trophies, like those related to Karakuri, require a particular play style. Make sure to experiment and practice those moves to complete the objectives more efficiently. Finally, be sure to consult online resources and community forums for tips on particularly challenging trophies. With these strategies in mind, the path to platinum will be much smoother.

Hidden Trophies

While The Wild at Heart doesn’t feature traditional “hidden” trophies in the sense of being completely obscured from the player, some achievements require specific actions or conditions that may not be immediately obvious. These could be considered the game’s ‘hidden’ challenges. Some of these trophies might involve unique combat scenarios, like defeating a Kemono without taking damage, or completing a hunt in a specific way. Others could be tied to exploration and discovering obscure locations within the game world. Pay close attention to the trophy descriptions, as they often hint at the requirements. Don’t hesitate to experiment with different approaches to combat and exploration; sometimes the key to unlocking a ‘hidden’ trophy lies in trying something unconventional. Consulting online communities and forums can also be beneficial, as players often share their discoveries and strategies for obtaining these less apparent achievements. Remember that persistent exploration and a willingness to try new things are key to uncovering all of the game’s secrets and ‘hidden’ trophies.

Trophy Completion Time

The time required to achieve platinum in The Wild at Heart can vary significantly depending on your playstyle, familiarity with the game’s mechanics, and dedication to trophy hunting. On average, most players can expect to spend between 10 to 20 hours to obtain all the trophies. A more efficient player, focusing on the quickest paths and most efficient strategies, could potentially achieve platinum in around 10 hours. However, those who enjoy exploring, experimenting with different combat styles, or taking their time with side quests might spend upwards of 20 hours or more. Save scumming can considerably reduce the time required, especially when farming for materials. The game’s learning curve, particularly with Karakuri usage and Kemono hunting, can also affect the overall time investment. The multiplayer trophies, while not required for the platinum, may add to the completion time if you’re aiming for a 100% completion rate. Overall, prepare to dedicate a reasonable amount of time to fully explore and conquer all of The Wild at Heart‘s challenges.

crucible pdf

The Crucible PDF⁚ An Overview

The Crucible PDF offers a digital version of Arthur Miller’s renowned play, exploring the Salem witch trials. This format allows readers to access the full script, stage directions, and character details. Some versions also include author commentary, enhancing the historical and dramatic context of the work.

Availability of The Crucible PDF

The PDF version of Arthur Miller’s “The Crucible” is widely accessible through various online platforms. Many educational resources and digital libraries offer free downloads, including the Internet Archive, which provides digitized copies from university libraries. These sources often include both PDF and ePub formats, catering to different reading preferences. Furthermore, websites dedicated to literature and dramatic works frequently host the play in PDF format, making it easily attainable for students and enthusiasts alike. Some publishers, like Penguin Classics, also offer digital editions of their publications, which may be available for purchase. In addition to direct downloads, some online platforms provide the option to read the PDF directly in a web browser. This widespread availability ensures that “The Crucible” is readily accessible to a global audience, supporting both academic study and personal enjoyment of this important work of American drama. Accessibility via these diverse platforms ensures that individuals have numerous options for obtaining and reading this poignant play. The play can be found by searching the title online and looking for the desired file format. Always ensure to use legitimate sources when acquiring digital content.

Content of The Crucible PDF

The PDF of “The Crucible” typically contains the complete text of the play, meticulously structured into acts and scenes. This includes all dialogue spoken by the characters, detailed stage directions indicating actions, settings, and character movements, which enhance the reader’s understanding of the play’s dramatic presentation. Character descriptions are also often included, providing insights into their personalities and relationships, which aids the reader in visualizing the characters. Some PDF versions may also include additional material such as author commentary, which offers historical and dramatic context, helping the reader to understand the play’s significance. Prefaces or introductions by literary scholars are also sometimes added, offering different perspectives on the themes and elements of the play. Furthermore, some editions feature notes on the historical background of the Salem witch trials, which deepens the reader’s understanding of the events that inspired the play. The inclusion of these additional features enriches the reading experience, making the PDF a valuable resource for both students and general readers. The formatting of the PDF will be consistent with a text document, making it easy to read and follow.

Historical Context in The Crucible PDF

Many PDF versions of “The Crucible” include valuable historical context, shedding light on the real events that inspired Arthur Miller’s play. This context typically delves into the Salem witch trials of 1692, explaining the social, religious, and political climate of the time. Readers can learn about the Puritan community in Salem, their strict religious beliefs, and their fear of the unknown, which fuelled the witch hunt. The historical sections often detail the accusations, trials, and executions of the accused individuals, highlighting the mass hysteria and paranoia that gripped the community. The PDFs may also include information about the roles of key historical figures, such as the local ministers and judges, and their influence on the events. This historical context helps the reader understand that the play is not just about witches; it’s about the dangers of mass hysteria, intolerance, and the abuse of power. By providing this background, the PDF enriches the reading experience and offers a deeper understanding of the play’s themes and messages. The information helps the reader to see the parallels between the events in the play and other periods of history, where similar acts of injustice have occurred. This historical background enhances the reader’s critical analysis of the play.

Penguin Classics Deluxe Edition Features

The Penguin Classics Deluxe Edition of “The Crucible” often boasts distinctive features that enhance the reading experience. These editions are typically designed with the iconic orange and white tri-band cover, a signature of Penguin Classics, harking back to its original design from 1935. The Deluxe editions often include french flaps, providing extra durability and a touch of elegance. High-quality paper is another hallmark, ensuring a pleasant tactile experience for the reader. The editions also often feature striking cover illustrations, adding an artistic dimension to the book. These design elements are aimed at providing a cutting-edge treatment that is characteristic of Penguin Classics Deluxe Editions. Furthermore, these editions often include additional content, such as introductions, forewords, or essays that provide further background and analysis of the play. These additions can offer readers valuable insights and perspectives, deepening their understanding of Miller’s work. The overall intention is to make a collectible edition that not only provides the text of the play but also adds to the experience of reading and owning the book. The focus is on both the aesthetic and the intellectual value of the work.

The Crucible as a Play

Arthur Miller’s “The Crucible” is a powerful drama intended for stage performance. The play is structured in four acts, with each act building tension and revealing character complexities. The script includes detailed stage directions that provide context for the setting, the characters’ actions, and their emotions, all of which are crucial for a successful theatrical production. Miller’s use of dialogue is sharp and dramatic, propelling the narrative forward and allowing the audience to understand the motivations and internal conflicts of the characters. The play often utilizes dramatic irony to heighten the emotional impact, particularly as the audience becomes aware of certain truths before the characters. The theatrical nature of “The Crucible” is emphasized by its focus on dialogue and action, making it a compelling experience for both performers and audience members. The play’s structure, character development, and dynamic dialogue make it a powerful piece of theatre that has resonated with audiences since its creation. The dramatic tension inherent in the narrative lends itself well to stage performance, allowing for a gripping and thought-provoking theatrical experience. It’s a piece designed to be seen and felt as much as read, which is why it continues to be staged frequently.

The Crucible’s Setting and Characters

The play is set in Salem, Massachusetts, in 1692, during the infamous witch trials. The setting plays a crucial role in establishing the atmosphere of fear, paranoia, and religious fervor that permeates the story. The time period itself provides a backdrop of Puritanical beliefs and strict societal norms which contribute to the conflict. The characters in “The Crucible” are complex and multifaceted, with each driven by their own motivations and flaws. Key figures include Reverend Parris, a self-serving minister, Abigail Williams, a manipulative young woman, and John Proctor, a conflicted farmer wrestling with his conscience. Other characters such as Elizabeth Proctor, Judge Danforth, and Reverend Hale contribute to the unfolding drama, each playing a role in the hysteria and injustices that unfold. The dynamics between these characters create tension and drive the narrative. These characters exhibit both admirable qualities and deep flaws, making them relatable and human. Their interactions and choices are essential to the play’s exploration of themes of morality, justice, and the dangers of mass hysteria. The characters’ complex relationships and motivations make them integral to the play’s power and impact.

The Crucible as a Metaphor

“The Crucible” functions as a powerful metaphor, extending beyond its historical setting to address broader societal issues. The Salem witch trials serve as a stand-in for the McCarthyism era in the United States, where accusations of communism led to blacklisting and persecution. The play explores the dangers of mass hysteria, where unfounded accusations and fear-mongering can lead to the destruction of individuals and communities. It highlights the fragility of justice when personal agendas and biases influence the legal process. The characters’ moral dilemmas mirror the ethical challenges faced by individuals in any situation of societal pressure. The play examines how easily truth can be distorted, and how quickly individuals can betray their values under pressure. The crucible itself represents the intense pressure under which characters are forced to make life-altering decisions. The story reveals the power of conformity, the importance of individual integrity, and the destructive nature of intolerance. “The Crucible” is a timeless work due to its ability to resonate with audiences across various eras and contexts. It serves as a warning against the dangers of unchecked power and the importance of defending individual rights.

The Crucible and Historical Events

“The Crucible” is deeply rooted in the historical events of the Salem witch trials of 1692, which serve as the play’s primary backdrop. The play recreates the atmosphere of paranoia and religious extremism that fueled the accusations and executions of innocent people. Arthur Miller’s work, however, transcends mere historical retelling; it uses the Salem events as a framework to explore broader societal themes. The play draws parallels to the McCarthy era in the 1950s, during which many Americans were accused of communism, often without sufficient evidence. The accusations in Salem and during McCarthyism were often based on fear and suspicion. The play exposes how quickly justice can be undermined in times of mass hysteria and how easily the accused can be demonized. The events depicted in the play, such as the court proceedings, the accusations, and the forced confessions, directly reflect the real historical occurrences of the Salem trials. It highlights the dangers of religious and political fanaticism. The play serves as a reminder of the importance of critical thinking and the protection of civil liberties, warning against the dangers of allowing fear to drive decision-making.

The Crucible’s Performance Rights

Securing the performance rights for “The Crucible” is a critical step for any theatre group, school, or organization planning to stage the play. These rights are not automatically granted with the purchase of a PDF or printed copy of the script; they must be obtained separately from the appropriate licensing agency. Typically, Dramatists Play Service, Inc. manages the performance rights for “The Crucible”. To acquire these rights, one must submit an application to the agency. The application needs to detail the nature of the production, the performance dates, and the venue. A licensing fee will be required, and the amount usually depends on various factors including the size of the venue, the number of performances, and whether the production is professional or amateur. These performance rights are essential to ensure the protection of the playwright’s intellectual property and to comply with copyright regulations. It’s important to begin the application process well in advance of the performance dates, to avoid any legal issues. The licensing agreement will also outline specific rules regarding alterations to the script and advertising the production. Unauthorized performances can lead to significant legal ramifications.

Educational Resources and Guides

Numerous educational resources and guides are available to enhance the study of “The Crucible,” often complementing the PDF version of the play. These materials include reading guides, which typically feature questions designed to probe deeper into the text, focusing on character motivations, plot developments, and thematic concerns. Teachers can find lesson plans and activities tailored to various learning levels. These plans often incorporate historical context, social commentary, and dramatic analysis. Study guides, available online and in print, provide summaries, character analyses, and explanations of key literary devices used in the play. Webquests, such as the one found on platforms like Docsity, offer interactive learning experiences, combining research with critical thinking. Furthermore, some resources offer guidance on essay writing, assisting students with developing compelling arguments about the play’s themes. Educators can also find materials that connect the play to contemporary social issues, promoting relevance and engagement with the material. These resources are designed to foster a more comprehensive understanding of “The Crucible,” its historical background, and its lasting impact on literature and society. These combined resources enable a richer learning environment.

pes anserine bursitis exercises pdf

Pes anserine bursitis is a condition causing pain on the inside of the knee. It often benefits from a structured exercise program. This includes stretches and strengthening activities.

Understanding Pes Anserine Bursitis

Pes anserine bursitis involves inflammation of the bursa, a fluid-filled sac, located between the shinbone and the hamstring tendons on the inner knee. This area, known as the pes anserinus, is where three tendons converge. Overuse, tight hamstrings, or direct trauma can irritate the bursa leading to pain, tenderness, and sometimes swelling. Understanding that this condition can affect individuals with varying levels of activity is important. The pain may worsen with activities like climbing stairs or getting up from a seated position. This condition is often managed effectively with a combination of rest, targeted exercises and stretches, and occasionally, more advanced interventions under medical guidance.

Initial Exercises for Pain Relief

Begin with gentle exercises to reduce pain and inflammation. These include quad sets, heel slides, and quadriceps stretches, focusing on pain-free movement initially.

Quad Sets

To perform quad sets, lie on your back with your affected leg straight. Gently tighten the muscles on the front of your thigh, as if you are trying to press your knee down into the floor or bed. Hold this contraction for about 5 to 10 seconds, then slowly relax. Ensure you are breathing normally throughout the exercise, avoiding any breath-holding. Repeat this exercise for 10 to 15 repetitions, several times throughout the day, as long as you do not experience pain. This helps to maintain the strength of the quadriceps muscles without putting stress on the knee joint. This exercise is a foundational step in your rehabilitation journey.

Heel Slides

Begin by lying on your back with your legs extended straight out. Bend your unaffected knee, placing your foot flat on the floor. Keeping your affected leg straight, gently slide your heel towards your buttocks. Let your knee bend as you slide. Move only as far as comfortable, without causing any sharp pain. Slowly slide your heel back to the starting position, fully extending the leg. Maintain a smooth, controlled motion throughout the exercise. Repeat this heel slide movement 10 to 15 times. Perform several sets during the day, as tolerated. This helps improve knee flexibility without stressing the inflamed area.

Quadriceps Stretch

To perform a quadriceps stretch, stand next to a wall or chair for support. Grasp your ankle of the affected leg with your hand. Gently pull your heel towards your buttocks, feeling a stretch in the front of your thigh. Keep your knees close together and avoid arching your back. Hold the stretch for 20 to 30 seconds. Release slowly and repeat 2 to 3 times. If you have trouble balancing you can lie on your stomach and then reach back for your ankle. This helps loosen the quadriceps muscles, which can sometimes contribute to knee pain. Be mindful not to overstretch or push into any pain.

Progression to Strengthening Exercises

Once pain decreases, begin strengthening exercises. These will help support the knee joint. Start with hamstring stretches. Then proceed to resistance band activities.

Hamstring Stretch

To perform the hamstring stretch, begin by lying on your back. Position yourself with your buttocks close to a doorway. Extend both of your legs straight out in front of you. Now, slowly raise one leg up, keeping it as straight as possible, until you feel a gentle stretch in the back of your thigh. Hold this position for about 20 to 30 seconds. Make sure to keep your other leg flat on the floor. Breathe deeply and evenly throughout the stretch. Avoid any bouncing or jerky movements. Slowly lower the leg back down. Repeat this stretch two to three times for each leg. This exercise enhances flexibility and is important in the treatment of bursitis.

Resistance Band Exercises

Resistance band exercises are a great way to gradually strengthen the muscles surrounding the knee. To start, secure a resistance band around your ankles. Begin with a light resistance band and gradually increase it as you get stronger. You can perform exercises such as leg extensions, where you slowly extend your leg against the resistance of the band, and lateral walks, where you step sideways while maintaining tension on the band. These exercises help to improve muscle strength and stability around the knee joint. Perform 10-15 repetitions of each exercise, and repeat the set two to three times. Remember to control your movements.

Advanced Exercises and Considerations

Progressing to advanced exercises is key for full recovery. This involves more dynamic movements and resistance. It is important to perform these under guidance.

Squats with Physioband

To perform squats with a physioband, begin by standing with your feet shoulder-width apart, and position a resistance band just above your knees. The band should provide a gentle resistance as you move. Start the squat by pushing your buttocks backwards, as if you are going to sit in a chair. Keep your knees aligned with your toes and make sure they do not collapse inward. Descend to a comfortable depth, ensuring that your upper body remains upright and your back stays straight. Throughout the squat movement, maintain tension on the physioband, which will help engage your leg muscles more effectively. Slowly return to the starting position, keeping the tension on the band as you ascend. This exercise targets the muscles around the knee and helps to stabilize the joint, improving strength and reducing pain.

Importance of Consistent Exercise

Consistent exercise is crucial for managing pes anserine bursitis. Regular adherence to a home exercise program can significantly improve outcomes and reduce pain.

Home Exercise Program Adherence

Adhering to your home exercise program is essential for effective management of pes anserine bursitis. Consistency in performing the prescribed exercises, including stretches and strengthening routines, plays a vital role in reducing pain and improving function. The program, often outlined by healthcare professionals, is designed to target the specific muscles and tissues affected by the condition. Regular participation in the exercises helps to maintain flexibility, build strength, and enhance overall knee stability. Skipping exercises or inconsistent practice can delay recovery and potentially exacerbate symptoms. Therefore, it’s crucial to make a commitment to following the home exercise plan as directed, even when you experience improvements, to ensure long-term relief and prevent recurrence of the condition. Consistent effort will lead to better outcomes and faster healing.

Monitoring Progress

Tracking your progress is crucial. Use a pain scale like the VAS to note changes. Observe pain levels during and after exercises. This helps adjust your program.

Pain Assessment with VAS Score

The Visual Analog Scale (VAS) is a simple tool to assess your pain levels. It typically uses a 0 to 10 scale, where 0 means no pain and 10 represents the worst imaginable pain. Before starting your exercise program, note your baseline pain level. During and after exercises, reassess your pain using the VAS score. This helps you understand how the exercises affect your knee. Keeping a record of these scores over time will reveal whether the exercises are effectively reducing your pain. If the score increases significantly during or after exercise, it may indicate the need to modify the exercise or consult with a healthcare professional. A consistent decline in the VAS score is a positive sign of progress. Remember, monitoring your pain level with the VAS score is an integral part of your recovery journey.

and Further Steps

If pain persists or worsens despite exercises, seek professional advice. A healthcare provider can offer guidance and further treatment options for your condition.

When to Consider Professional Advice

It’s crucial to recognize when self-management of pes anserine bursitis through exercises might not be enough, and seeking professional help becomes necessary. If your knee pain persists despite consistent adherence to a home exercise program, or if the pain intensifies, a healthcare provider should be consulted. Additionally, if you experience any sharp, shooting pains, or if you notice any swelling, redness or heat around your knee, these are signs that warrant professional medical attention. Furthermore, if your range of motion is severely limited, or if you have difficulty bearing weight on your affected leg, it is important to seek evaluation from a qualified healthcare professional. They can help determine if there are any underlying issues contributing to your pain and recommend more specialized treatments if needed. They can also rule out other conditions that might mimic pes anserine bursitis symptoms. A proper diagnosis is essential for effective treatment.

disclaimer of inheritance form pdf

What is a Disclaimer of Inheritance Form?

A disclaimer of inheritance form is a legal document used by a beneficiary to renounce their right to inherit assets from a deceased person’s estate. It allows the beneficiary to refuse the inheritance, which then passes to the next eligible heir. This form is a formal statement of renunciation.

Definition and Purpose

A Disclaimer of Inheritance form is a written legal instrument by which a potential heir or beneficiary formally declines their right to inherit assets or property from a deceased individual’s estate. This document serves as an official declaration that the beneficiary does not want to receive the inheritance, effectively relinquishing any claim to the bequeathed assets. The primary purpose of this form is to allow individuals to strategically manage their financial affairs by avoiding the responsibilities, tax implications, or other consequences associated with accepting an inheritance. This decision can be driven by various factors, including the desire to redirect assets to another beneficiary, the intention to minimize tax burdens, or the simple unwillingness to take on the administration of inherited property. By using this form, a disclaimant ensures that the inheritance is passed on as if they had predeceased the deceased, in accordance with the will or state intestacy laws, providing legal clarity and preventing any future disputes.

When is it Used?

A disclaimer of inheritance form is typically used when an individual, named as a beneficiary in a will or trust, chooses not to accept the assets or property they are entitled to inherit. This might occur for various reasons, often related to estate planning or tax considerations. For instance, a beneficiary may wish to avoid the tax implications associated with the inheritance, preferring to pass the assets to the next beneficiary in line. Another common scenario is when the beneficiary’s financial situation doesn’t require the inherited assets, or when they want to ensure the assets go to someone else, such as their own children. It’s also used when the administrative burden of managing the inherited property is undesirable. This form can be used to avoid potential liabilities associated with the inherited assets. Finally, it can be used when an individual wants to pass the inheritance to someone else, like the next person in line, as if they had predeceased the testator;

Key Components of the Form

The disclaimer of inheritance form includes crucial sections. These sections detail the disclaimant, the deceased, and the inherited property. Essential details are required for the form to be legally valid. This information must be accurately completed.

Disclaimant Information

This section of the disclaimer of inheritance form is dedicated to gathering detailed information about the individual who is choosing to renounce their inheritance. It typically requires the full legal name of the disclaimant, ensuring there is no ambiguity regarding their identity. The form also mandates the disclaimant’s current residential address, providing a verifiable location for official purposes. Furthermore, it’s common to find fields requesting contact details such as a phone number and email address. This allows for direct communication if any clarification is needed during the processing of the disclaimer. The disclaimant’s date of birth may also be required, further confirming their identity and legal capacity to execute the document. This section aims to establish a clear record of who is waiving their right to the inheritance, ensuring the legal validity of the disclaimer and preventing future disputes regarding their identity or intentions. Accurate completion of this section is paramount for the entire process.

Details of the Deceased

This portion of the disclaimer of inheritance form is meticulously designed to capture essential details about the deceased individual, whose estate is the subject of the disclaimer. The full legal name of the deceased is a primary requirement, ensuring accurate identification and avoiding any confusion, particularly when multiple individuals with similar names are involved. The date of death of the deceased is also crucial, as it establishes the timeline for inheritance and the associated legal processes. Furthermore, the form typically requests the last known address of the deceased, which helps in verifying their residency and domicile for probate purposes. It is also common to include fields for the deceased’s date of birth, as this is helpful in confirming their identity. This information provides the necessary context for the inheritance, ensuring that the disclaimer is correctly applied to the specific estate of the deceased person. Accurate details in this section are essential.

Description of Inherited Property

This section of the disclaimer form requires a thorough and precise description of the property or assets being disclaimed. It must clearly identify the specific items, whether they are real estate, financial accounts, personal belongings, or any other form of inheritance. For real estate, the form often asks for the full legal address, including the street number, city, state, and zip code, as well as any legal descriptions like lot numbers or parcel IDs. If the inheritance includes bank accounts or investment portfolios, the form typically requires the account numbers, the name of the financial institution, and the type of account. For other assets, such as vehicles or personal property, a detailed description is needed, including serial numbers or identifying features where applicable. This detailed information allows for the accurate identification of the items being disclaimed to avoid any ambiguity. This section is crucial for ensuring clarity regarding what the heir is renouncing.

Legal Aspects and Consequences

Disclaiming an inheritance is a legally binding action. Once a disclaimer form is signed, it is generally considered irrevocable. This decision has significant legal consequences regarding how the disclaimed assets are distributed to other heirs.

Irrevocability of the Disclaimer

A crucial legal aspect to understand about a disclaimer of inheritance is its irrevocability. Once a disclaimer form has been properly executed and filed, the decision to refuse the inheritance is generally final and cannot be reversed. This means that the individual who disclaims their inheritance cannot later change their mind and claim the assets. The act of disclaiming is a definitive choice to forgo any rights to the specified property or assets. Therefore, it is imperative that the disclaimant fully comprehends the implications before signing the document. The irrevocability of a disclaimer aims to provide certainty and finality in the distribution of the estate. The decision should be made with careful consideration of all personal and financial circumstances, as there are no legal mechanisms to undo this decision. Seeking legal counsel before submitting the disclaimer form is often recommended to ensure the individual understands the long-term legal consequences.

Who Inherits After Disclaimer

When a beneficiary disclaims an inheritance, the assets do not simply disappear; they are passed on to the next eligible recipient. The process of determining who inherits after a disclaimer is usually dictated by the deceased’s will or trust. If the will specifies a contingent beneficiary, the disclaimed assets will typically go to that individual or entity. However, if no contingent beneficiary is named, the distribution will then be determined by state laws of intestacy. These laws often prioritize the deceased’s closest relatives, such as children, spouse, or parents, depending on their specific family structure. It is important to note that the disclaimant has no control over who receives the disclaimed inheritance. The assets will pass as if the disclaimant had predeceased the testator. This ensures a clear and legally defined process for the redistribution of assets after a disclaimer has been made, maintaining order and preventing ambiguity in estate administration. Proper planning and understanding of these rules is crucial for all involved parties.

How to Create and Use the Form

Creating a disclaimer form involves carefully filling in personal information, details of the deceased, and the inheritance being disclaimed. The completed form then requires proper filing, often with the probate court, and meticulous documentation to ensure its legal validity.

Steps to Complete the Form

Completing a disclaimer of inheritance form requires meticulous attention to detail and adherence to specific procedures. First, gather all necessary personal information, including your full legal name, address, and contact details. Next, accurately provide the deceased’s information, such as their full name, date of death, and any relevant case numbers. Identify the specific assets or property you wish to disclaim, ensuring a clear description of each item. Carefully review the form to confirm all information is correct. You must clearly state your intention to disclaim the inheritance, acknowledging that it is a voluntary decision. Ensure you understand that this choice is irrevocable. Sign and date the form in the presence of a notary public, if required by your jurisdiction. Keep copies of the completed form for your records, and proceed to submit the original to the appropriate court or authority within the necessary timeframe. It is crucial to verify the legal requirements in your specific location to ensure compliance.

Filing and Documentation

Proper filing and documentation of a disclaimer of inheritance form are essential for its legal validity. After completing the form, make several copies for your personal records. The original document must be filed with the appropriate court or probate office, typically where the deceased’s estate is being administered. Be sure to meet all filing deadlines, as missing them could invalidate the disclaimer. It’s crucial to ensure the form is signed and, if required, notarized correctly. You may need to include additional documentation, such as a copy of the death certificate. Confirm with the court clerk about any specific filing procedures or fees that may apply. You will receive a stamped copy once the filing is complete, which serves as proof. Keep all documentation in a safe place as it will be needed for the estate settlement. You must also inform the executor or administrator of the estate about your disclaimer, to ensure the estate is correctly distributed. Failure to adhere to these steps could result in complications.

communion to the sick pdf

Communion of the Sick is a vital practice‚ bringing the Eucharist to those unable to attend Mass. This ministry provides spiritual support and connection for the sick and homebound‚ offering comfort and grace. It is a sign of the Christian community’s concern for its ill members.

Purpose of Communion to the Sick

The primary purpose of bringing Communion to the sick is to offer spiritual nourishment and strengthen their connection with Christ. It’s not just a ritual; it’s an act of mercy‚ expressing the community’s care and support for those who are suffering or confined. By receiving the Eucharist‚ the sick are reminded that they remain integral members of the Church‚ even when they cannot physically participate in the Mass. This act connects them to the larger Eucharistic celebration‚ fostering a sense of unity and belonging. Furthermore‚ it provides an opportunity for prayer‚ reflection‚ and spiritual consolation during challenging times. The Eucharist‚ received in illness‚ is a source of comfort‚ hope‚ and healing‚ both spiritually and emotionally‚ serving as a profound encounter with the divine.

Essential Resources for Eucharistic Ministers

Eucharistic Ministers require specific resources to effectively serve the sick. These include service booklets‚ liturgical cards‚ and other guides to ensure proper administration of Communion.

Service Booklets and Guides

Service booklets for Eucharistic Ministers are essential tools‚ providing the approved rites for bringing Communion to the sick. These booklets contain the necessary prayers‚ readings‚ and pastoral instructions‚ ensuring the sacrament is administered correctly. They often include texts for both ordinary circumstances and hospital settings‚ catering to different needs. Additionally‚ many booklets are available in bilingual formats‚ such as English and Spanish‚ to accommodate diverse communities. These guides are designed to be portable and easy to use‚ allowing ministers to focus on the spiritual needs of those they serve. Many are also printed in large type for easier reading. This ensures that ministers‚ whether seasoned or new‚ have the necessary liturgical support.

Portable Liturgical Cards

Portable liturgical cards serve as a convenient resource for extraordinary ministers of Holy Communion. These cards are designed to be easily carried‚ ensuring ministers have the necessary texts at their fingertips. Typically‚ these cards contain the essential prayers and rites for administering Communion to the sick‚ often excerpted from official liturgical books. The text is usually presented in an accessible format‚ making it easy for ministers to follow during their visits. Many of these cards are printed in two colors on heavy paper stock for durability. They are often revised to include the latest liturgical guidelines‚ ensuring ministers are using the most up-to-date resources. This compact format is ideal for busy ministers‚ providing quick access to key information.

Content of Communion of the Sick Resources

Resources include official rites‚ texts‚ readings‚ and prayers for administering Communion to the sick. They also offer pastoral instructions‚ guidelines‚ and essential information for Eucharistic ministers and the recipients.

Official Rites and Texts

The official rites and texts for Communion of the Sick are derived from the Church’s liturgical books‚ ensuring a consistent and proper celebration of the sacrament. These texts include the specific prayers‚ blessings‚ and scriptural passages that are to be used by the Eucharistic minister when bringing communion to those who are ill or homebound. The rites cover various circumstances‚ including ordinary situations and those in hospitals or institutions. These official materials provide a framework for the minister‚ guiding them through the process of administering the Eucharist in a reverent and meaningful way. They also ensure that the celebration aligns with the Church’s liturgical norms and traditions‚ offering a sense of continuity and connection to the wider community. The texts are often available in formats suitable for easy use in different settings.

Readings and Prayers

The readings and prayers within the Communion of the Sick service are carefully selected to provide comfort‚ hope‚ and spiritual nourishment for the recipient. These may include passages from Scripture that speak of healing‚ faith‚ and God’s love‚ often focusing on the themes of Jesus as the Good Shepherd‚ the bread of life‚ and the power of the Eucharist. The prayers are designed to seek God’s mercy‚ strength‚ and peace for the sick individual. They acknowledge the person’s suffering while affirming their connection to the community of believers. These readings and prayers are essential components that provide a meaningful encounter with God’s presence through the sacrament‚ helping individuals to feel supported and uplifted in their time of illness. The selection aims for a message of hope and healing.

Pastoral Instructions and Guidelines

Pastoral instructions and guidelines for administering Communion to the Sick are crucial for ministers. These guidelines ensure respect for the sacrament and the individual‚ offering guidance on preparation‚ conduct‚ and appropriate actions. They emphasize the importance of a prayerful approach‚ creating a peaceful environment‚ and providing support to the sick person. The instructions cover various scenarios‚ including ordinary circumstances and situations in hospitals or institutions. They address the role of the minister in offering both spiritual comfort and practical assistance. These guidelines are not merely procedural; they are designed to facilitate a meaningful encounter with Christ. They promote sensitivity‚ empathy‚ and the understanding of the profound impact that the Eucharist can have on those who are ill. They are designed to make the process smooth and reverent.

Preparation and Support for the Sick

Preparing to receive the Eucharist is an important part of the process. This includes both spiritual and practical steps. Providing support to the sick is a vital aspect of the ministry.

Preparing to Receive the Eucharist

Preparation for receiving the Eucharist involves a spiritual readiness‚ often including prayer and reflection. The sick may use resources like the “Communion of the Sick” booklet‚ which provides readings and prayers for this purpose. These materials can be used to help one focus on the significance of receiving Christ. Individuals may also find comfort in familiar scripture passages‚ and using this time for personal reflection. The focus is on preparing one’s heart and mind‚ acknowledging the sacredness of the sacrament. This preparation helps the sick fully experience the spiritual benefits of communion and feel connected to their faith community‚ even from home. It’s a time for contemplation and opening oneself to God’s grace.

Benefits for Sick and Homebound Individuals

Receiving Communion at home offers immense spiritual comfort and support for sick and homebound individuals. It provides a profound connection to the wider church community‚ reminding them they are not forgotten. The sacrament strengthens their faith‚ offering grace and healing during times of illness or isolation. The Eucharist is a tangible sign of God’s love and presence‚ bringing hope and peace. This act of receiving communion helps maintain their spiritual well-being and offers the sick a vital link to the Eucharistic celebration. It is a privilege‚ reinforcing their identity as members of the Body of Christ and providing solace and spiritual nourishment. This practice helps combat loneliness and isolation.

Practical Aspects of Ministering

Ministers need official texts for bringing the Eucharist to the sick. These resources guide them through administering the sacrament‚ offering proper prayers and readings. Portable cards and booklets aid in this ministry.

Administering the Sacrament

Administering the sacrament of Communion to the sick requires careful attention to the prescribed rites and prayers. Extraordinary Ministers of the Eucharist must use the official texts‚ ensuring that the process is conducted with reverence and respect. These texts offer a structured approach‚ guiding ministers through each step of the service. It is essential to follow the guidelines provided in the service booklets and liturgical cards‚ which detail the appropriate readings and responses. The minister should be mindful of the individual’s needs and preferences‚ adapting the approach as necessary while adhering to the established liturgical norms. Furthermore‚ maintaining a prayerful and compassionate demeanor is crucial‚ as this is a moment of significant spiritual importance for the recipient. The minister should also ensure the proper handling of the consecrated elements‚ following all protocols with care and devotion‚ and should consider the environment of the setting‚ whether at home‚ in a hospital or institution.

Texts for Ordinary Circumstances and Hospitals

The texts used for administering Communion to the sick vary slightly depending on the setting. For ordinary circumstances‚ such as a home visit‚ the rite typically includes specific prayers and readings tailored for a more personal setting. These texts often emphasize comfort and healing‚ offering words of hope and encouragement for the communicant. In contrast‚ texts for hospitals or institutions may incorporate prayers that acknowledge the unique challenges and environments of these settings. These might include petitions for medical staff‚ other patients‚ and a peaceful atmosphere. Both sets of texts‚ however‚ are drawn from the official rites‚ ensuring liturgical consistency. It is important for Extraordinary Ministers of the Eucharist to be familiar with both‚ allowing them to adapt their approach appropriately. The availability of these texts in service booklets and on portable liturgical cards ensures that ministers can always access what they need. Furthermore‚ the texts might include specific considerations for different situations‚ such as when administering Viaticum.

Spiritual Significance and Community

Communion for the sick is a powerful sign of community support and concern. It connects the sick with the Eucharistic celebration‚ offering spiritual nourishment and a reminder of their belonging within the Church.

Communion as a Sign of Support

The act of bringing Communion to the sick is a profound expression of the Christian community’s care and support for its members who are suffering. It transcends a simple religious ritual‚ becoming a tangible demonstration of compassion and solidarity. This gesture assures those who are ill or homebound that they are not forgotten or isolated‚ but rather remain an integral part of the larger faith community. Receiving the Eucharist in their time of need not only provides spiritual nourishment but also serves as a powerful reminder of their connection to the body of Christ. The community’s outreach through Eucharistic ministers provides a sense of belonging‚ fostering hope and strength during times of vulnerability. It affirms that they are held in the prayers and hearts of fellow believers‚ strengthening their faith journey amidst illness and hardship. This act of love highlights the communal nature of Christian faith.

Connection to the Eucharistic Celebration

Bringing Communion to the sick ensures that those unable to attend Mass remain connected to the central act of worship within the Christian faith. It allows them to participate spiritually in the Eucharistic celebration‚ uniting them with the community gathered in prayer. This connection is not merely symbolic but rather a real participation in the body of Christ. Through receiving the Eucharist‚ the sick are joined with the same grace and blessings that are bestowed upon those present at Mass‚ emphasizing the unity of the Church. This act highlights that distance or illness does not exclude anyone from the salvific power of the Eucharist‚ reinforcing the belief that all members are part of the body of Christ‚ regardless of circumstance. It bridges the gap between those who are present at Mass and those who are not‚ fostering a sense of shared experience and spiritual communion.

estes bill of lading pdf

What is an Estes Bill of Lading?

An Estes Bill of Lading, often seen as a PDF document, is a crucial shipping form that acts as both a receipt for cargo and a contract between the shipper and Estes, the carrier. This document contains essential shipment details.

Definition and Purpose of a Bill of Lading

A Bill of Lading (BOL), especially in the context of an Estes shipment, serves as a fundamental document in freight transportation. It is essentially a receipt issued by the carrier, acknowledging the receipt of goods for shipment. This document includes critical details about the cargo, such as its description, quantity, and destination. The primary purpose of a BOL is multi-faceted. It acts as a legal contract between the shipper and the carrier, outlining the terms and conditions of the shipment. Additionally, it functions as a document of title, demonstrating ownership of the goods during transit. The BOL’s information allows for proper tracking and handling of the freight throughout its journey. In essence, this document ensures a smooth and transparent shipping process, protecting the interests of both the shipper and the carrier. The correct completion of this document is vital.

Estes Bill of Lading as a Contract

The Estes Bill of Lading isn’t just a shipping receipt; it’s a legally binding contract between the shipper and Estes Express Lines. This contract establishes the terms of the freight transportation service. By signing the BOL, both parties agree to the conditions outlined within, including liability, payment terms, and responsibilities during transit. The BOL specifies the type of service, delivery locations, and any special instructions for handling the goods. It details the obligations of Estes as the carrier, and of the shipper concerning proper packaging and accurate declaration of contents. This contractual nature of the BOL provides a framework for resolving disputes or claims. It is essential to understand this document serves as a comprehensive agreement, ensuring both parties are aware of their rights and responsibilities regarding the shipment. The document also references the Estes Rules Tariff EXLA 105, which adds another layer of legal consideration.

Key Information on an Estes Bill of Lading

An Estes Bill of Lading contains key details, such as shipper and consignee information, descriptions of goods, container and seal numbers, and weight and piece counts for proper tracking and delivery.

Shipper and Consignee Details

The Estes Bill of Lading (BOL) necessitates the precise recording of both the shipper and consignee information. This includes the full legal name, complete street address, city, state, and zip code for both parties. Accurate details ensure that the shipment originates from the correct location and is delivered to the designated recipient without any issues. Contact details such as phone numbers and email addresses are also essential for communication regarding the shipment. Any discrepancies in these details can lead to delays or misdeliveries, highlighting the importance of meticulous attention to detail during the BOL completion; Moreover, including the shipper’s and consignee’s tax identification numbers may also be necessary for certain types of shipments. The clarity and accuracy of these details are paramount for the seamless transit of goods. A well-completed section avoids confusion and ensures smooth handling of the shipment by Estes. Incorrect information can result in extra costs, delays, and administrative issues, underscoring the importance of double-checking all entries.

Detailed Description of Goods

A comprehensive description of the goods is a critical component of the Estes Bill of Lading. This section requires a clear, concise, and detailed account of the items being shipped. It’s important to include the specific name of the goods, not just a general category. For example, instead of “electronics,” specify “laptop computers” or “LED televisions.” If the goods are hazardous or require special handling, such information should be clearly stated, as well as the corresponding hazard class or UN number. The description should also include any relevant model numbers, serial numbers, or unique identifiers. When dealing with a variety of items, it is best to list them separately, rather than combining them under a single description. This helps in the accurate identification and management of the cargo throughout the shipping process. Proper classification of the items is also essential for ensuring correct application of the applicable tariffs and compliance with the shipping regulations. The more detailed and accurate this section, the more smoothly the delivery process will be.

Container and Seal Numbers

The inclusion of container and seal numbers on an Estes Bill of Lading is crucial for maintaining the integrity and security of the shipment. If the goods are transported in a container, the unique identification number of each container must be accurately recorded on the BOL. This number serves as a tracking identifier and helps in locating the specific container at any point during the journey. Furthermore, if a seal is applied to the container after it has been loaded, the corresponding seal number must also be documented. This seal number acts as a verification mechanism, ensuring that the container has not been tampered with during transit. Any discrepancy between the recorded seal number and the actual seal number at delivery can indicate possible security breaches or damage to the cargo. These numbers are essential for maintaining a clear chain of custody and will be important in the event of a loss or damage claim. This section must be meticulously completed to avoid any confusion or potential delays.

Weight and Piece Counts

Accurately recording the weight and piece counts on an Estes Bill of Lading is of paramount importance for proper freight handling and billing. The weight of the shipment, typically measured in pounds or kilograms, needs to be precisely stated to ensure the carrier can properly plan for loading, transportation, and delivery. Incorrect weight information can lead to significant discrepancies in billing and may cause delays. Additionally, the number of pieces or packages being shipped, whether they are boxes, pallets, or other units, must be clearly indicated. This piece count allows the carrier to verify that all items listed on the BOL are accounted for during pickup and delivery. Any variations between the recorded piece count and the actual count could indicate lost or misplaced items. These details are not only crucial for operational efficiency but also for resolving any potential discrepancies between the shipper and the receiver, making meticulous attention to these details an absolute necessity for an accurate and smooth delivery process, as required by Estes.

Estes Bill of Lading in Practice

The Estes Bill of Lading functions as a critical tool in daily shipping. It serves as a receipt, allowing tracking, and provides a record of the agreement. This ensures smooth operations;

Estes Bill of Lading as a Receipt

The Estes Bill of Lading serves as a crucial receipt, acknowledging that the carrier, Estes, has taken possession of the specified goods for transportation. Upon pickup, this document confirms the transfer of responsibility from the shipper to Estes. As a receipt, it details the items, including the piece counts and weights, providing a clear record of the cargo that has been entrusted to the carrier. This ensures that both parties have an agreed-upon inventory of the shipment. The Bill of Lading also acts as proof that the goods are in the carrier’s custody, which is vital for insurance purposes and if any discrepancies arise during transit. Furthermore, it is the document that the receiver will use to verify that all items listed have been received in good condition. It is an essential component of the shipping process, offering a clear and comprehensive record of the transaction and the goods being shipped. This receipt is not just a mere formality; it is a fundamental element of the entire shipping cycle.

How to Track an Estes Bill of Lading

Tracking an Estes Bill of Lading (BOL) is essential for monitoring the progress of your shipment. Typically, you’ll need the unique BOL number assigned to your shipment, which you can find on the physical or digital copy of your Bill of Lading. With this number, you can access the Estes website or use their dedicated tracking tool, which provides real-time updates on your shipment’s location and status. These systems utilize the BOL number to identify your shipment within Estes’ network, allowing you to see when it was picked up, any stops it has made, and its estimated delivery date. This tracking capability ensures transparency and allows for better planning. Additionally, you can often receive email or text notifications regarding updates in the shipping status. By using the BOL number, shippers and consignees can stay informed about their freight’s journey, ensuring a streamlined and predictable delivery process. Keeping track of your BOL is vital for efficient logistics management.

Forms and Tools related to Estes Bill of Lading

Estes provides various resources, including PDF forms for Bills of Lading, a Web Service API for integration, and a Loss and Damage Claim form, to facilitate seamless shipping processes.

Estes Bill of Lading PDF Forms

Estes provides Bill of Lading (BOL) forms in PDF format, allowing shippers to easily access and complete them digitally. These PDF forms are designed to capture all necessary information for a shipment, ensuring that both the shipper and the carrier have a clear record of the goods being transported. The availability of these forms in PDF format streamlines the process of creating and managing BOLs, reducing the need for paper-based documentation. Shippers can download these forms, fill them out electronically, and then print or send them digitally. The standardized format of the Estes BOL PDF ensures consistency and facilitates accurate information transfer. Moreover, these forms can be edited using various PDF editors, allowing for customization and easy correction of errors. Access to these digital forms makes the process more efficient, saving time and reducing the likelihood of mistakes. The Estes BOL PDF is a crucial tool for managing freight effectively, contributing to a smoother shipping experience. These forms often include fields for shipper and consignee details, a description of goods, weight, piece counts, and more. Additionally, these forms align with Estes Rules Tariff EXLA 105, ensuring compliance with shipping regulations.

Estes Bill of Lading Web Service API

Estes also provides a Bill of Lading (BOL) Web Service API, which allows for the integration of their BOL system directly into shippers’ existing software platforms. This API streamlines the BOL creation process, enabling businesses to generate and manage shipping documents electronically, without needing to manually fill out PDF forms. By using the Estes API, companies can automate data entry, reducing errors and saving time. The integration with existing systems can include functionalities like automatic address population, real-time rate quotes, and shipment tracking. This integration enhances efficiency and reduces manual work. The Estes Bill of Lading API is designed to make shipping processes more convenient and faster. It allows developers to embed Estes’ functionality directly into their applications, creating a seamless user experience. Moreover, the API ensures that all BOLs generated are accurate and compliant with Estes’ standards. Utilizing the API can improve workflow, increase productivity, and minimize the risk of errors. This technology offers a modern, efficient solution for managing freight shipments, making it easier for businesses to handle their logistics operations effectively. The API is a key tool for streamlining shipping processes and enhancing overall efficiency.

Estes Loss and Damage Claim Form

The Estes Loss and Damage Claim Form is a crucial document for shippers who experience issues with their freight during transit. This form allows customers to formally report any loss, damage, or shortage of goods shipped with Estes. The claim form requires detailed information about the shipment, including the Bill of Lading number, date of shipment, and specific details about the damaged or lost items. It is essential to fill out this form accurately and completely to ensure a smooth claims process. Along with the form, claimants may need to provide supporting documents like photographs of damaged goods, packing lists, and invoices. Proper completion and submission of the form are key to initiating the investigation; Estes will review the claim and determine the extent of their liability. They aim to resolve claims fairly and efficiently. The Estes Loss and Damage Claim Form is readily available on their website, often in PDF format, making it easy for shippers to access and fill it out. Submitting a claim is an important step in recovering losses and protecting shippers’ interests. The form also facilitates communication and collaboration between the shipper and Estes for a resolution.

Importance of Correct Completion

Accurate completion of the Estes Bill of Lading is vital to prevent shipment delays, avoid extra charges, and ensure that liability and compliance with Estes rules tariff EXLA 105 are maintained.

Avoiding Common Mistakes on the BOL

One frequent error when filling out an Estes Bill of Lading (BOL) is providing incomplete or inaccurate shipper and consignee information, which can lead to delivery issues. Another common mistake is not describing goods properly, including failing to specify the correct weight or piece counts, which can affect shipping costs and liability. Furthermore, neglecting to include crucial details like container and seal numbers can lead to tracking problems and potential disputes. It’s also important to use the correct Bill of Lading form, as different types of shipments may require specific versions. Shippers should also avoid making alterations or erasures on the BOL, as it is a legal document. Failure to include or correctly declare hazardous materials can have serious legal consequences. Moreover, not indicating any special handling requirements can cause damage to the freight. Shippers must also remember to sign and date the BOL. Understanding the terms and conditions of the Uniform Bill of Lading is also essential to avoid misunderstandings. Finally, relying on memory instead of verifying information can introduce costly errors.

Ensuring Compliance with Estes Rules Tariff EXLA 105

Adhering to Estes Rules Tariff EXLA 105 is crucial when using an Estes Bill of Lading (BOL), and this involves understanding the specific guidelines and regulations outlined in this tariff. The tariff provides the framework for all shipping transactions with Estes, encompassing rules on liability, claims, and the classification of goods. Shippers must familiarize themselves with these rules to avoid penalties and ensure a smooth shipment. Compliance includes accurately declaring the freight’s classification as it directly impacts shipping costs. Furthermore, the tariff dictates how to handle loss and damage claims, including the timeframe and necessary documentation. It also clarifies the responsibilities of the shipper and the carrier. Failure to comply with EXLA 105 can lead to the rejection of claims, additional charges, or even legal issues. Therefore, shippers need to thoroughly review the tariff and complete the BOL accurately, referencing relevant sections when needed. The BOL is not just a shipping document but a tool that aligns with EXLA 105.